To upgrade your computer, look no further than your motherboard. It’s the backbone of your system and is integral to the performance of your computer. While the motherboard may seem like a complex and intimidating piece of hardware, there are many simple ways to get the most out of it.
This post will provide you with 9 tips on maximizing the potential of your motherboard so that you can get the best performance out of your system. Keep reading to find out more!
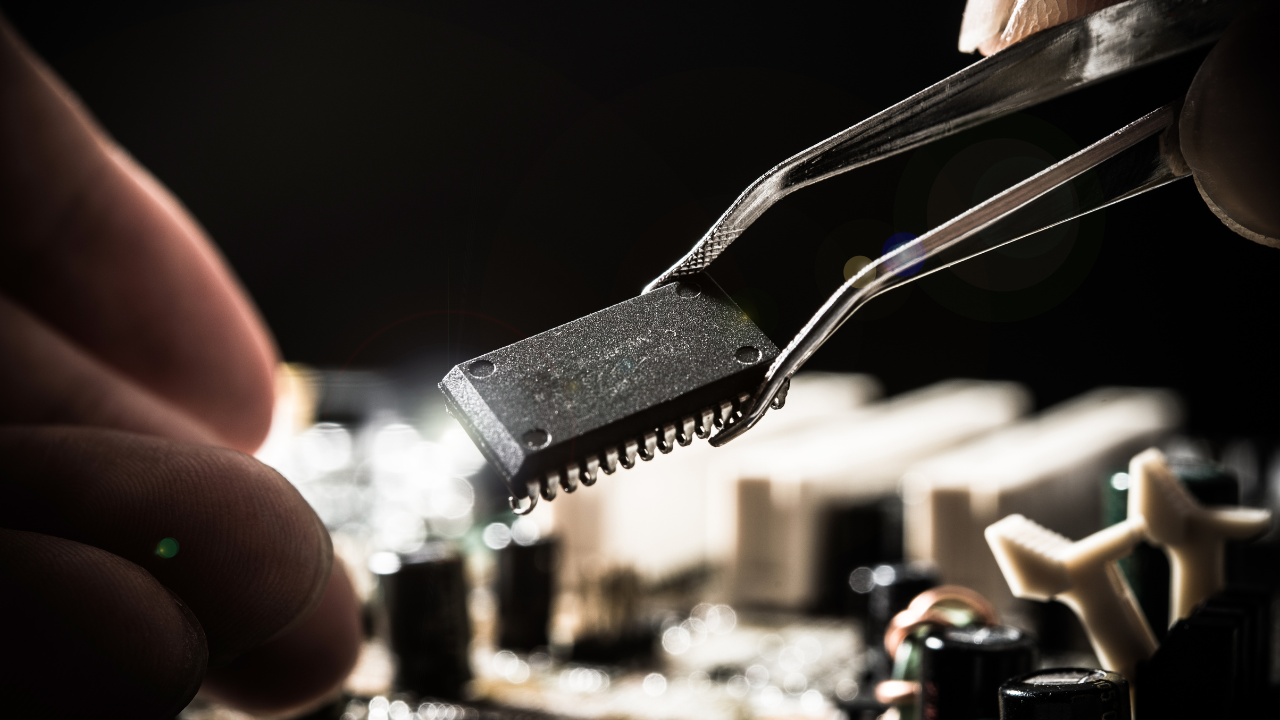
1) Keep It Clean
One of the most important things you can do to get the most out of your motherboard is to keep it clean. Dust and debris can accumulate over time, leading to decreased performance and even premature hardware failure. The best way to ensure your motherboard stays in tip-top shape is to give it a good cleaning every few months.
Start by unplugging all power sources and removing components not permanently attached to the motherboard.
Make sure to wear protective gloves when handling any parts of your system.
Compressed air removes dust or debris from the surface, and the heat sinks.
To ensure the motherboard is completely clean, you may also need to use a cotton swab with some rubbing alcohol to gently remove any residue.
Once everything has been cleaned, it is important to ensure all components are securely fastened before powering on your system. It will help ensure that all connections are secure and will help maximize the performance of your motherboard. Keeping your motherboard clean is one of the easiest and most effective ways to ensure it runs optimally for years to come.
2) Check For Driver Updates
The second most important step you can take to get the most out of your motherboard is to check for driver updates regularly. Drivers are software that enables hardware, such as your motherboard, to communicate with your operating system.
Outdated drivers can cause system instability, poor performance, and even crashing. It’s important to keep your drivers up to date to get the best performance out of your motherboard.
The easiest way to check for driver updates is to use Windows Update, a built-in tool included in Windows 10, you can access it from Settings. There you can check if any new drivers are available for your motherboard and other components. Alternatively, you can download drivers directly from your motherboard manufacturer’s website.
BIOS updates can fix bugs, improve security, and add new features. Make sure to carefully read the instructions provided with each update before attempting it. If done incorrectly, a BIOS update can cause serious issues with your system. It’s also a good idea to check your motherboard manufacturer’s support page periodically for BIOS updates.
3) Use The Right Tools
The right tools are essential for getting the most out of your motherboard. Using the right tools is important for properly installing, maintaining, and troubleshooting your motherboard. A few important tools you should always have; screwdriver, thermal paste, and a pair of pliers.
A screwdriver is needed for loosening and tightening screws.
Thermal paste should fill in gaps between the CPU and heat sink to improve heat transfer.
Pliers may be needed for removing and installing jumpers, which are small metal connectors that allow you to enable or disable certain features.
4) Customize Your BIOS
It is an important part of your motherboard, and customizing it can be a great way to get the most out of your setup. The BIOS contains settings that can be adjusted to enhance performance and adjust the hardware for optimal usage.
Before you start customizing your BIOS, it is important to make sure you have all the necessary information. This includes the current driver versions and model numbers. It will ensure that your hardware supports the changes you make.
Once you have everything ready, it’s time to get into the BIOS. To customize your BIOS, you will need to access Advanced Mode. This mode provides more in-depth options for customization than the regular BIOS menu.
In Advanced Mode, you can start making changes. It’s best to familiarize yourself with each setting before making any changes. Some settings that are typically adjusted are RAM speed, clock speeds, voltages, and fan speeds. Adjusting these settings can increase performance.
It is also important to ensure that any settings you change are within the limits of your system’s capabilities. If you overclock or change the voltage too much, it can cause damage to the components. So, if you are unfamiliar with advanced settings, it is best to consult a professional for help.
5) Use The Right Ram
Regarding your motherboard, the RAM is one of the most important components. Using the wrong RAM can lead to slowdowns, crashes, and other serious problems. So, it’s important to choose the right RAM for your motherboard.
First, you should ensure that your RAM is compatible with your motherboard. Check your motherboard’s and RAM’s specs to ensure they are compatible.
You should also consider the type of RAM your motherboard supports. DDR4 and DDR5 are the most common types of RAMS, but some motherboards may support other types. Check what type of RAM your motherboard supports before buying any RAM sticks.
Finally, pay attention to the speed and timing of your RAM. Higher speeds and lower timings can provide a better performance, but it will not make a difference if your motherboard does not support higher speeds. Check what speed and timing your motherboard supports before purchasing any RAM sticks.
When selecting the right RAM for your motherboard, compatibility, speed, and timing are all important factors. If you consider these factors, you’ll be able to get the most out of your motherboard and enjoy a smooth and reliable computing experience.
6) Enable XMP
XMP, or Extreme Memory Profile, is a feature available on most modern motherboards that allows you to customize your memory settings for better performance. It can be a great way to get the most out of your motherboard and maximize your system’s speed.
To enable XMP, you’ll first need to check if your motherboard supports it. Most modern motherboards support XMP, but you should always double-check before proceeding.
After determining that your motherboard does support XMP, you’ll need to access your BIOS settings. This can be done in a few different ways depending on the make and model of your motherboard. See the documentation that came with your motherboard for more details.
Once you’ve accessed your BIOS, look for an option to enable XMP. It is usually found under the “Advanced” tab in most BIOS menus. From here, you should be able to adjust the settings for each RAM module installed in your system, allowing you to optimize their performance.
Enabling XMP can significantly impact your system’s performance, so it’s worth doing if you want to get the most out of your motherboard. With the right settings, you can maximize your system’s speed and get better results from any applications or games you run.
7) OC Your CPU
Overclocking your CPU (Central Processing Unit) can be a great way to get the most out of your motherboard. Overclocking increases your processor’s clock speed beyond its factory settings, giving it a boost in performance. It’s important to note that overclocking does not guarantee increased performance and can be risky if done incorrectly.
To enable overclocking your CPU, the first thing you’ll need to do is make sure your motherboard supports overclocking.
Next, research the maximum frequency your CPU can be safely overclocked to. Depending on the chip and other components, this can vary widely. You can usually find this information online or in your CPU’s manual.
After knowing the maximum frequency, you can begin the overclocking process. It involves adjusting the clock multiplier and voltage settings in your BIOS. Adjust these carefully, as going too far can damage your system.
To ensure you don’t push the limits too far, you can use software to help with overclocking. Software like Intel XTU, MSI Afterburner and AMD Ryzen Master allows you to control your overclock settings more precisely. Some even have features to help you find the optimal overclock settings for your setup.
Once you’ve done the right settings, save them in your BIOS to stay in effect even after a reboot. Then, keep an eye on your system temperatures while running at the new speeds. If they become too high, you may need to reduce overclock.
With some patience and practice, overclocking your CPU can be a great way to get the most out of your motherboard and increase your system’s performance. Just remember to proceed cautiously, as there is always a risk of damaging your components if done incorrectly.
8) Use A High-Quality PSU
Your power supply is the heart of your system, so it’s important to ensure you have a reliable and high-quality unit. A good power supply will provide clean and consistent power to your motherboard and other components. Poor-quality power supplies can be unreliable and potentially even cause damage to your components.
Look for power supplies with a high rating and feature multiple 12v rails for stable power delivery. It’s also important to ensure the PSU comes with good quality protection circuitry, such as over-voltage, under-voltage, overload, over-current, and short-circuit protection.
9) Monitor Your Temps
Monitoring your motherboard’s temperature is essential to keeping your system running optimally. Excessive heat can cause hardware to malfunction or even lead to component failure. Fortunately, most motherboards are equipped with temperature sensors to help you track and monitor the temperatures of your components.
When checking your motherboard’s temperature, it’s important to pay attention to the temperature of the CPU, GPU, and other components that generate heat. The CPU and GPU temperatures should not exceed 70-80C; otherwise, you risk permanent damage to the components. You should also be aware of other components, such as RAM and storage devices, as they can also become hot and cause problems if they get too hot.
You can monitor your motherboard’s temperature using the BIOS or a third-party monitoring tool such as HW Monitor or Core Temp. When monitoring your temperatures, it is recommended to set custom thresholds so that you are notified when the temperature of any component is too high. This way, you can immediately reduce the component’s temperature before it causes any permanent damage.
In addition to monitoring your temperatures, it is also a good idea to ensure that your case has proper ventilation and adequate airflow. It will help ensure that your components stay cool and do not overheat. You should also ensure that your fans are running at the correct speed, as too slow fan speed can result in excessive heat build-up.
By properly monitoring your motherboard’s temperature and taking proactive measures to reduce heat build-up, you can ensure that your system runs optimally for years.
Conclusion
Using the right tools and customizing your BIOS, keeping your motherboard clean and up to date with driver updates, using the right RAM and enabling XMP, overclocking your CPU, using a high-quality PSU, and monitoring your temps are all important aspects to consider.
Making the most of your motherboard doesn’t have to be complicated. You can ensure that your motherboard runs smoothly and efficiently with a few simple steps and tools. By following these steps, you can get the most out of your motherboard and ensure it runs properly for years.